New Asiga customer?
PRO 4K XL
Setting up the PRO 4K XL
The diagram below illustrates the main components of your PRO 4K XL
How to power ON the PRO 4K XL.
Connect the power cable to the printer and a power outlet.
The power button should turn green when turned on.
When the PRO 4K XL has been plugged in and powered on, there are a few steps that need to be performed before printing.
First you must select your desired language.
You will be prompted for product registration.
Product registration will allow Asiga to link the printer to your account.
Please navigate to www.asiga.com/register and make note of the printer serial number displayed on screen.
Fill out the following fields & click Activate.
Enter this activation code on the front panel of your PRO 4K.
There are three ways to connect to your PRO 4K 3D printer
From the Main Menu select Settings.
Select wired network.
To set up a WiFi Connection, select wireless network.
Tap on Network Name and select your network from the dropdown list.
Note: Wireless Direct must be turned off.
Wireless Direct allows the printer to act as a wireless access point. This can be used if there is no router available.
Select Wireless Direct.
Note: This will prevent any WiFi connections to be performed.
Default settings for Wireless Direct:
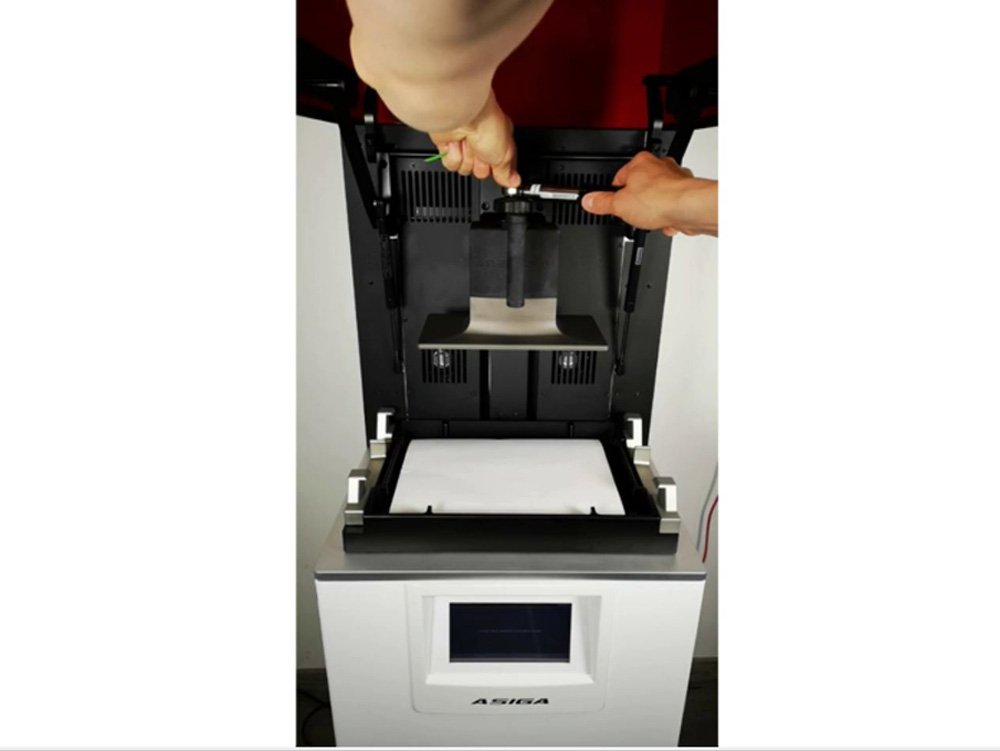
Build Platform Calibration must be performed regularly to ensure optimal performance from your printer.Asiga recommends calibrating once a month.
The final step to getting your printer print ready!
Eye or skin contact with uncured resin may cause irritation.
Always wear nitrile gloves.
Don’t miss out! For the latest Asiga news and announcements join our newsletter today.