Composer
Additional resources
Composer
Optimising 3D printing for Audiology with Multi Range
What is Multi Range?
Requirements
Composer 1.3.2 and firmware 2020-07-14 or later.
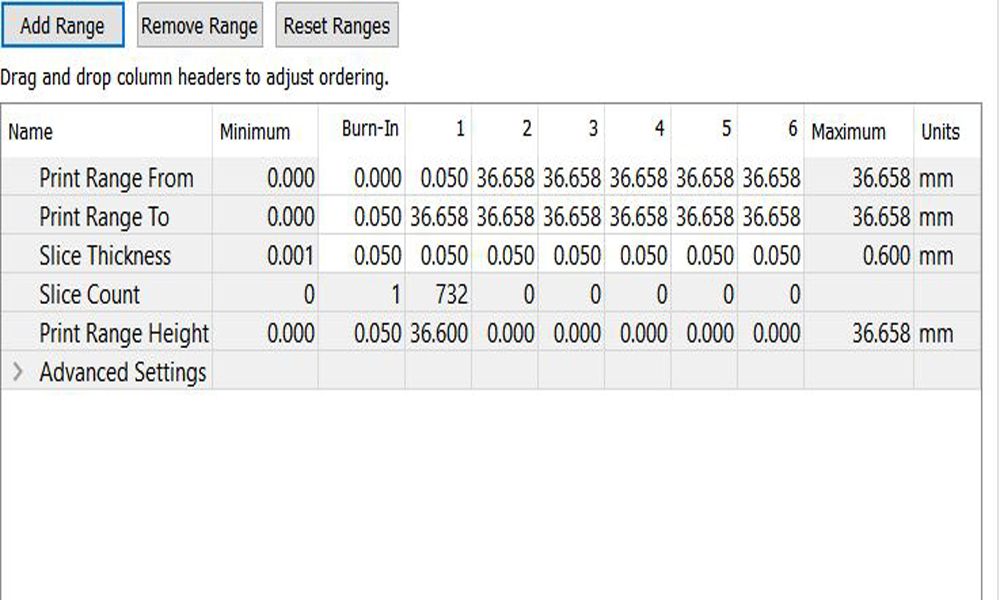
Multi Range allows users to select different layer thicknesses or change advanced parameters throughout a build using print ranges.
When would this be useful?
- To speed up the range that involves Baseplate and Supports
- To reduce Light Intensity for the transition from cone/supports to model to extend tray life time and prevent delamination or suction cup damage.
- To speed up the part of the object that has no top surfaces with shallow angles.
- We can optionally add a range that smoothens out top surfaces with shallow angles by reducing layer thickness.
Sounds great, how do I use it?
Activating Multi Range is simple in the Advanced Parameters of Composer.
- Start by opening your build
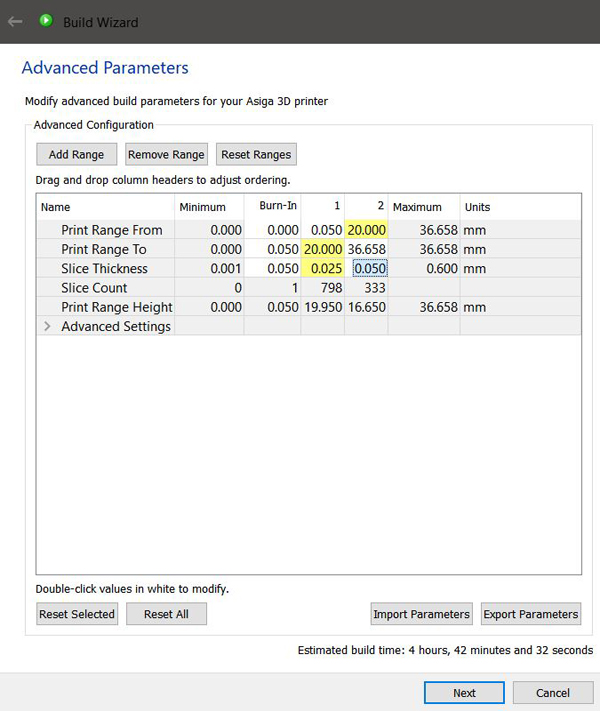
- Open the build wizard and navigate until you get to this screen
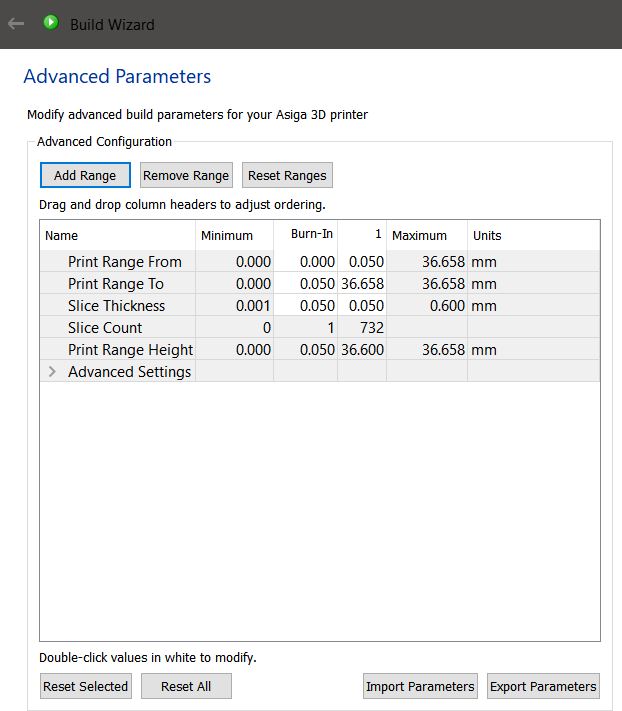
By default there are 2 ranges:
- Burn in
- Range 1
Click Add Range to add a range.
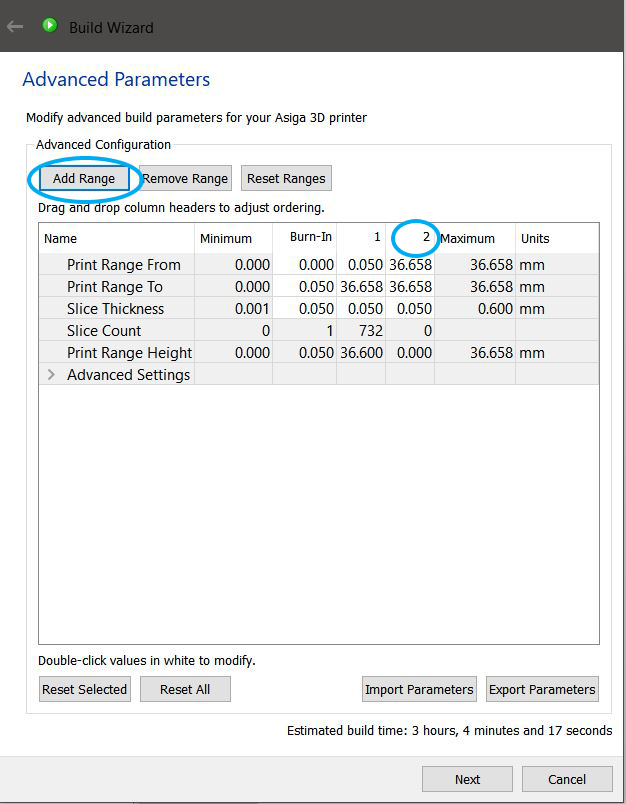
- ‘Print Range from’ will display in mm where this range starts
- ‘Print Range to’ will display in mm where this range stops
- ‘Slice thickness’: what slice thickness this range will print
In the example shown the first range will print in 25 microns up to 20mm height.
Exposure times for each print range will update automatically based on layer thickness chosen.
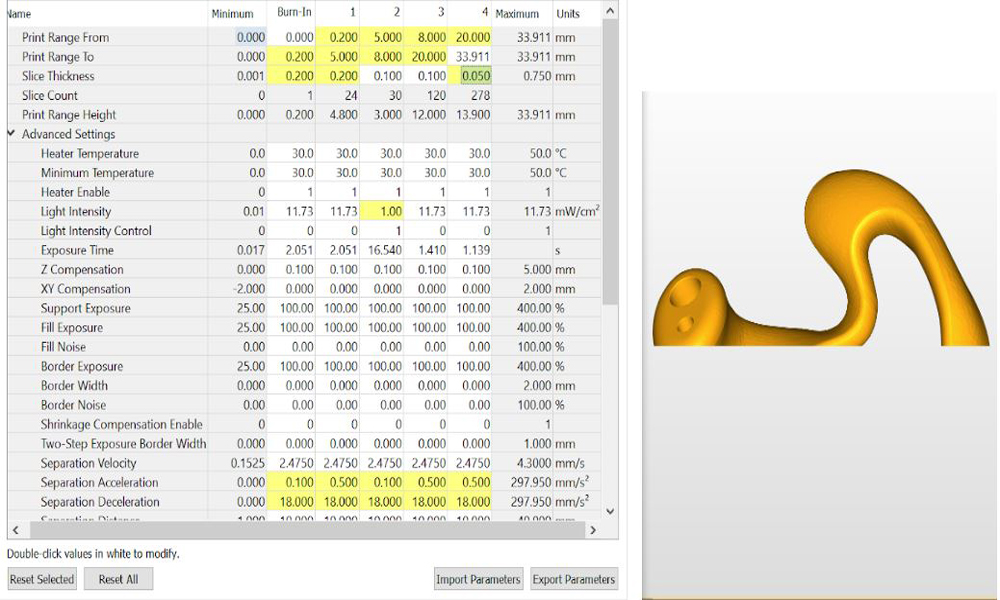
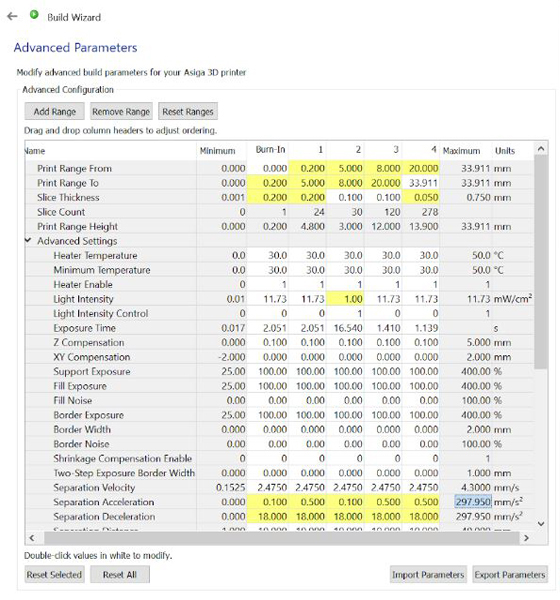
Example of settings for a classic earmold
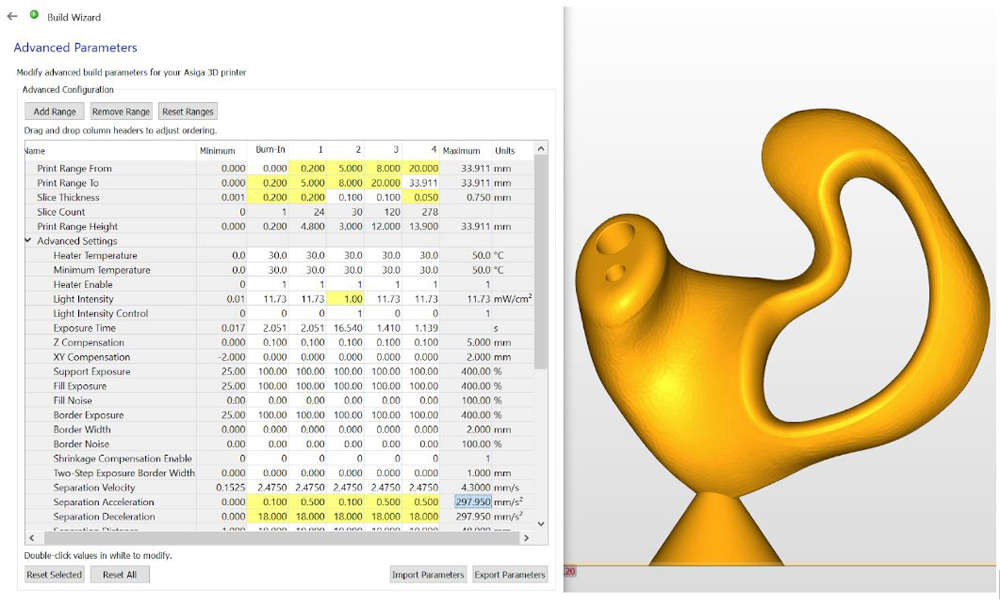
Burn-In Range
0.00 mm to 0.2 mm: 200 micron layer thickness
Light intensity: maximum
Seperateion Acceleration: 0.1
We can change the Layer Thickness to a thicker one as no critical details or shapes in this layer. We change the Seperation Acceleration to 0.1 to make release of the film much smoother – protecting the film from damage.
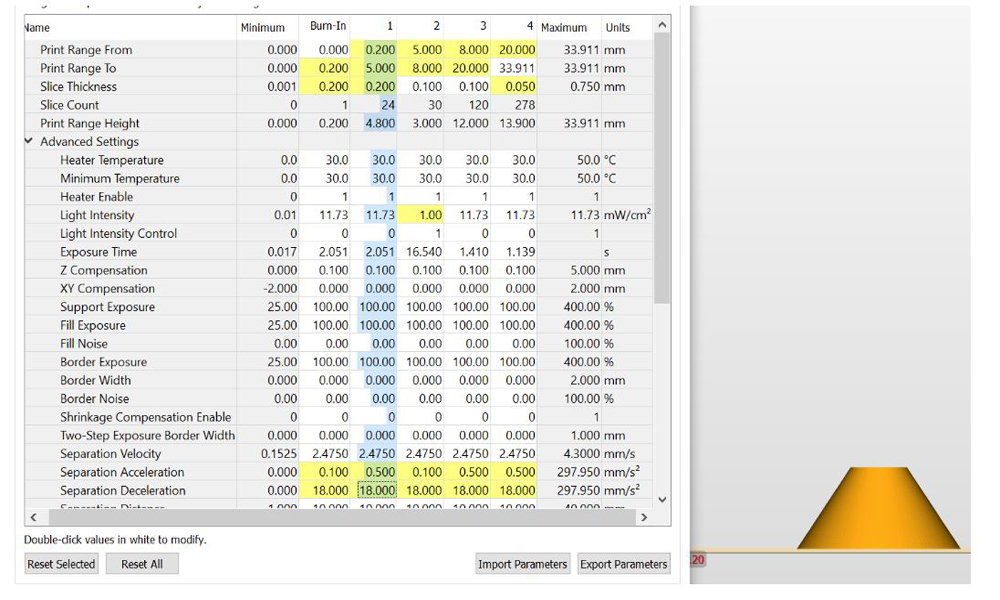
Print Range 1
0.2mm to 5mm: 200 micron layers
Light Intensity: maximum
Seperation Acceleration: 0.5
This will speed up the cone support layers considerably.
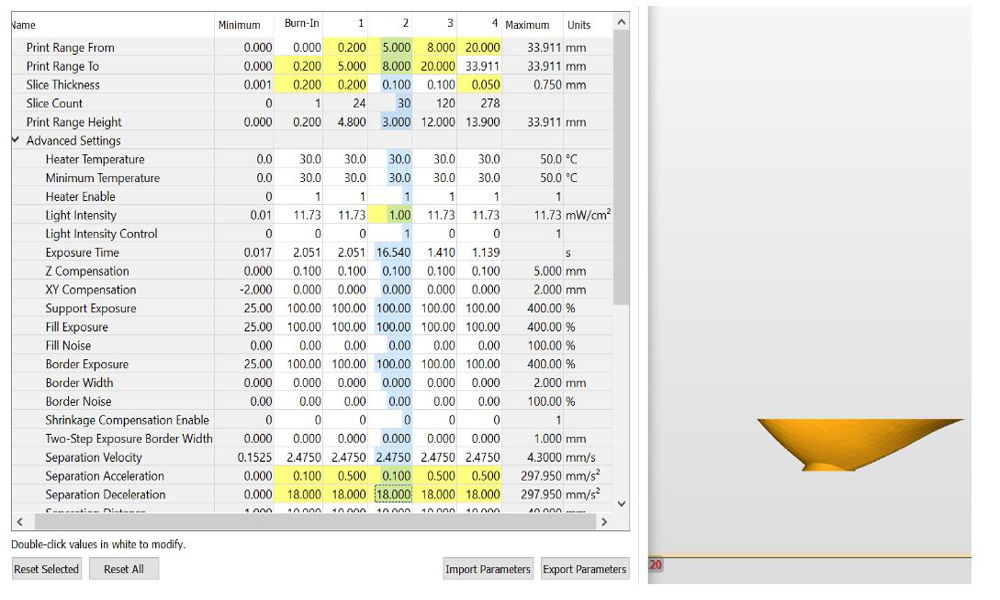
Print Range 2
5mm to 8mm: 100 micron layers
Light Intensity: 1mW
Seperation Acceleration: 0.1
Undersides and sides facing towards the platform are usually printed much smoother and work well with 100 micron. We add this small range to reduce stress on the tray by reducing Light Intensity and Seperation Acceleration (note: 0 will turn Seperation Acceleration off completely, 0.1 is the lowest value accepted).
Print Range 3
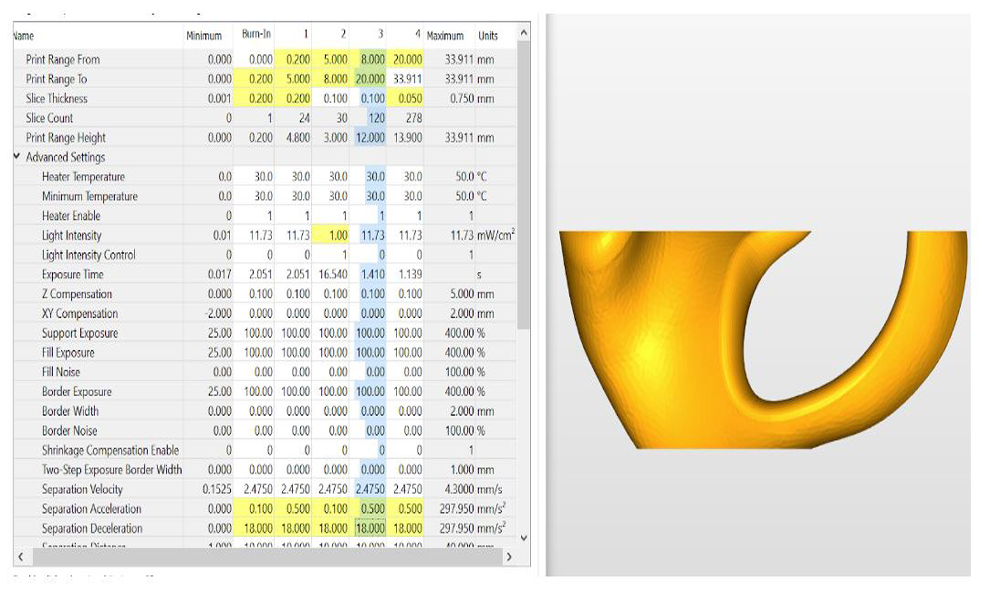
8mm to 20mm: 100 micron layers
Light Intensity: maximum
Seperation Acceleration: 0.5
This is your main print range. This part of the object is in most cases uncritical.
Print Range 4
20mm to end: 50 micron layers
Light Intensity: maximum
Seperation Acceleration: 0.5
Using 50 micron layers will reduce polishing efforts to smooth out surfaces at the top.
